You'd think that making some rubble and building wreckage for wargaming would be relatively simple. I mean we spend lots of time painting our models, then we move on to carefully and loving crafting buildings and scenery so you would think that broken buildings would be the opposite of all this care and dedication. Just smash up some bits of wood, rock, plastic, old models then cover a piece of scrap hardboard or card with glue and scatter liberally. Splash on a coat of paint, random dry brush and hey presto - rubble.
Well I thought the same but no it was not to be. You see my gaming club, The Pennine Raiders (the website ain't that great so don't Google it!) regularly holds various tournaments and events and was recently the host for a Bolt Action Gaming Day themed on the fall of Berlin (and Germany in general). As you can imagine the there were a number of skirmishes/battles in built up areas during WW2 so we needed some ruined buildings, which we do not have an abundance of. In steps club member and Wargames Tournaments proprietor Ed (http://wargamestournaments.com/) who designed some ruins to our spec and promptly made a ton of mdf prepainted ruined buildings for the event.
Now they looked great, nice and easy to build (but time consuming when your making 30+ of the darn things) and populated two 6 x 4 boards nicely. However upon reflection Geraint (the TO) and I noticed that once laid out the boards looked remarkably clean. In steps Ed again with several cardboard boxes of off cuts from other commissions and so with 2 weeks to go I set to with PVA and a pile of rubbish (no offence Ed!).
Now referring back to the start of this post, it turns out that it isn't as easy as described. Firstly I had to sort through and find the most appropriate bits from the collection of junk (once again no offence Ed) and make several piles of the same size bits.
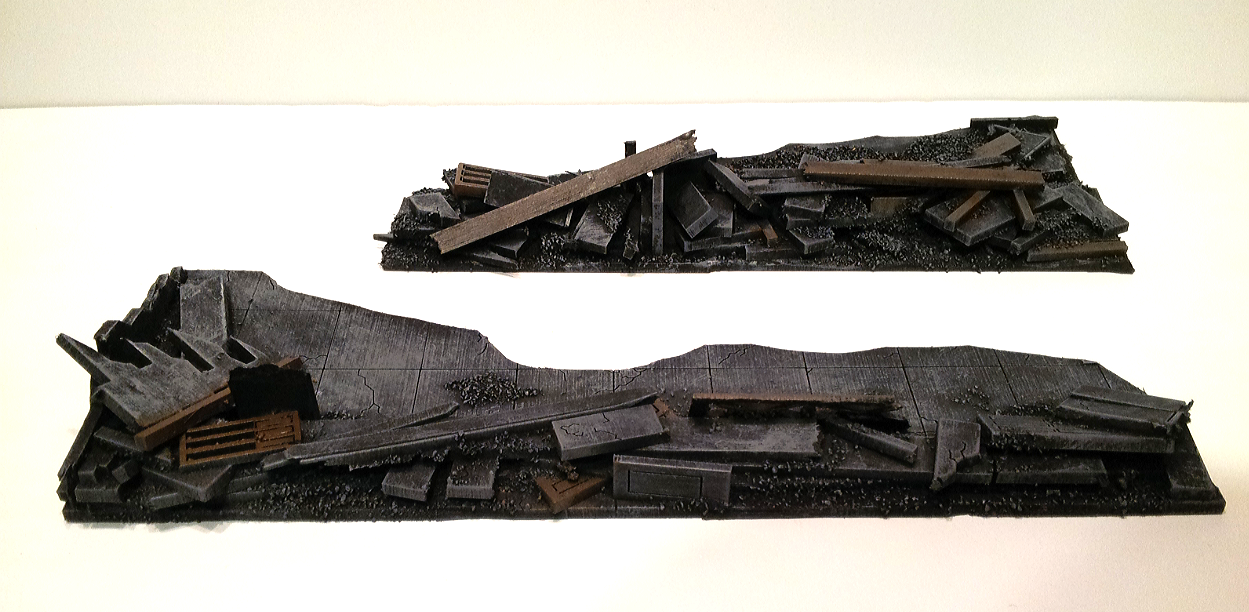
Then I made various random shapes as bases from the scrap mdf in the box, and smoothed out the edges. Then I set to with PVA liberally slathering said bases to seal them, then sticking down some larger pieces of scrap as the foundations of the rubble and slowly building up with smaller pieces. Once it had reached an acceptable height for a 28mm model to hide behind I tailored them with easily identifiable pieces such as doors and railings and other bits that would give it more of theme rather than just a pile of junk. More PVA, a scattering of sand and railway ballast and off to the oven it all went to gently bake (it doesn't make a nice cake but it certainly dries the PVA quickly).
Once dry it was time for 3 coats of black spray (my usual cheapo automotive spray!). This time I let it dry outside otherwise my better half would be a little annoyed that the oven now smells of spray paint. I left everything overnight and the following day mixed up varying shade of grey from my artists acrylics and dry brushed the heck out of them. Only thing left was to pick out some timbers and doors with a little burnt umber and they were done.
And so what I envisaged as a quick afternoon job whilst sat in the garden watching the kids playing turned into a mammoth 3 day slog of PVA stickiness, sand and broken mdf everywhere and bad spray paint smells!. That'll teach me to volunteer for things. And then to top it all off, with only a week and half to go I volunteer to swap from Allies to Axis to balance things out because a few players pulled out. I know it doesn't sound like much until you realise that I have a completely unpainted German army! So in the next post I'll show you the end result of my 5 day paint job!. I say it quite a lot, but its true I guess - I work better under pressure.


No comments:
Post a Comment